Skip to content
TechToolsHQ
NewsReviewsGuidesTech 101Tech SeriesToolsNewsletter
TechToolsHQ

Independent, research-driven tech coverage — breaking news, in-depth reviews, buying guides, and technical tutorials to help you understand and choose with confidence.

Explore
NewsReviewsGuidesTech 101Tech SeriesFree Tools
Legal
About UsOur AuthorsContact UsPrivacy PolicyTerms of ServiceCopyright & DMCAAffiliate DisclosureEditorial PolicyAdvertise With Us

© 2026 TechToolsHQ. All rights reserved.

Tech Series/DevOps/How the Internet Actually Works: From Browser to Server
DevOps · Part 2 of 2

How the Internet Actually Works: From Browser to Server

Follow one request — from pressing Enter to the page rendering — through DNS, TCP, TLS, and HTTP.

By Himanshu Bhatt· 3 min read· September 29, 2026

How the Internet Actually Works — article cover.
Key Takeaways · TL;DR
  • Your browser can’t use a domain name — it only speaks IP addresses, ports, and TCP, which is why DNS runs first.
  • One page load is a sequence: DNS → port → TCP handshake → TLS → HTTP request → server → response → render.
  • https:// means port 443 and encryption; http:// means port 80.
  • TCP is connection-based: a handshake opens the connection before any data is sent.
  • HTTP rides inside TCP, which rides inside IP, which rides inside the network — nested boxes.
  • Each step is a failure point, and each maps to a command: dig/nslookup, ping, nc/telnet, curl, and curl -v.
☰ On this page(show)(close)
  • 1.Step 0: What your browser actually needs
  • 2.Step 1: DNS — name to IP
  • 3.Step 2: Choosing the port (HTTP vs HTTPS)
  • 4.Step 3: The TCP connection
  • 5.Step 4: TLS (the HTTPS security layer)
  • 6.Step 5: The HTTP request is sent
  • 7.Step 6: The request reaches the server
  • 8.Step 7: The response travels back
  • 9.The full flow at a glance
  • 10.Where things usually break
  • 11.Commands mapped to each step
On this page
  • 1.Step 0: What your browser actually needs
  • 2.Step 1: DNS — name to IP
  • 3.Step 2: Choosing the port (HTTP vs HTTPS)
  • 4.Step 3: The TCP connection
  • 5.Step 4: TLS (the HTTPS security layer)
  • 6.Step 5: The HTTP request is sent
  • 7.Step 6: The request reaches the server
  • 8.Step 7: The response travels back
  • 9.The full flow at a glance
  • 10.Where things usually break
  • 11.Commands mapped to each step
INFO

Part 2 of the DevOps series. In Part 1 we covered the terms; here we follow a single request end to end. You type https://myapp.com, press Enter — and a lot happens before the page appears. Let us trace it.

Step 0: What your browser actually needs

Your browser cannot talk directly to domain names, applications, containers, or Kubernetes. It only knows how to talk to IP addresses and ports, using TCP.

The browser cannot talk directly to domain names, applications, containers, or Kubernetes. It only speaks IP addresses, ports, and TCP. DNS bridges the gap by turning a name into an IP.
The browser only speaks IP, ports, and TCP — DNS bridges the gap.
✕THE BROWSER CANNOT TALK TO
  • ✕Domain names
  • ✕Applications
  • ✕Containers
  • ✕Kubernetes
✓IT ONLY SPEAKS
  • ✓IP addresses
  • ✓Ports
  • ✓TCP
  • ✓DNS turns names into IPs

So the browser’s very first question is: "What IP address should I connect to?" That is where DNS comes in.

Step 1: DNS — name to IP

From Part 1: DNS is the phonebook of the internet. Your browser asks the operating system, "Do you know the IP for myapp.com?" If it does, you get back an IP like 13.234.56.78 and move on.

  • Cache hit: your system already knows the IP, so there is no network request and the response is faster.
  • Cache miss: your system asks a DNS resolver, which asks other DNS servers until it gets an IP address.
WARNING

If DNS fails, everything stops here — the browser has no address to connect to.

Step 2: Choosing the port (HTTP vs HTTPS)

The https in the URL matters. It tells the browser to use port 443 and encrypted communication. If it were http://, that would mean port 80. So now the browser knows both the IP and the port:

IP:   13.234.56.78
Port: 443

Step 3: The TCP connection

Before any data is sent, TCP does something crucial: it opens a connection with a handshake. This is why TCP is called connection-based.

Before any data is sent, TCP opens a connection: the client asks can I connect, the server replies yes, and the client confirms okay lets talk. This is why TCP is connection-based.
The TCP handshake opens a connection before any data is sent.
●THE TCP HANDSHAKE
Client
ask
Server
agree
Client
  • •The client asks can I connect, the server says yes, the client says okay let's talk.
  • •This back-and-forth is why TCP is connection-based.
  • •If it fails: connection refused or connection timed out.

If this step fails, you see errors like "connection refused" or "connection timed out" — usually a firewall blocking it, a port that is not open, or a service that is not running.

Step 4: TLS (the HTTPS security layer)

Because this is HTTPS, another step happens. The browser and server agree on encryption, exchange certificates, and set up a secure channel. If TLS fails, you see a "your connection is not private" warning or certificate errors.

Step 5: The HTTP request is sent

Only now does the browser actually send the request:

GET / HTTP/1.1
Host: myapp.com

And here is the key idea: HTTP is inside TCP, TCP is inside IP, and IP is inside the network. Think of it like nested boxes.

[ Network
  [ IP
    [ TCP
      [ HTTP request ] ] ] ]

Step 6: The request reaches the server

On the server side, the OS receives the packet, TCP hands the data to the application, and the web server (Nginx, Node, and so on) processes it. The application logic runs and a response is created:

HTTP/1.1 200 OK

Step 7: The response travels back

The response goes back through TCP, over the network, to your browser. Your browser then parses the HTML, loads the CSS and JS, and makes more requests — which repeat these same steps. One page load is many network requests.

The full flow at a glance

Put every step together and this is the core internet flow — the path of a single request from your browser to the server and back.
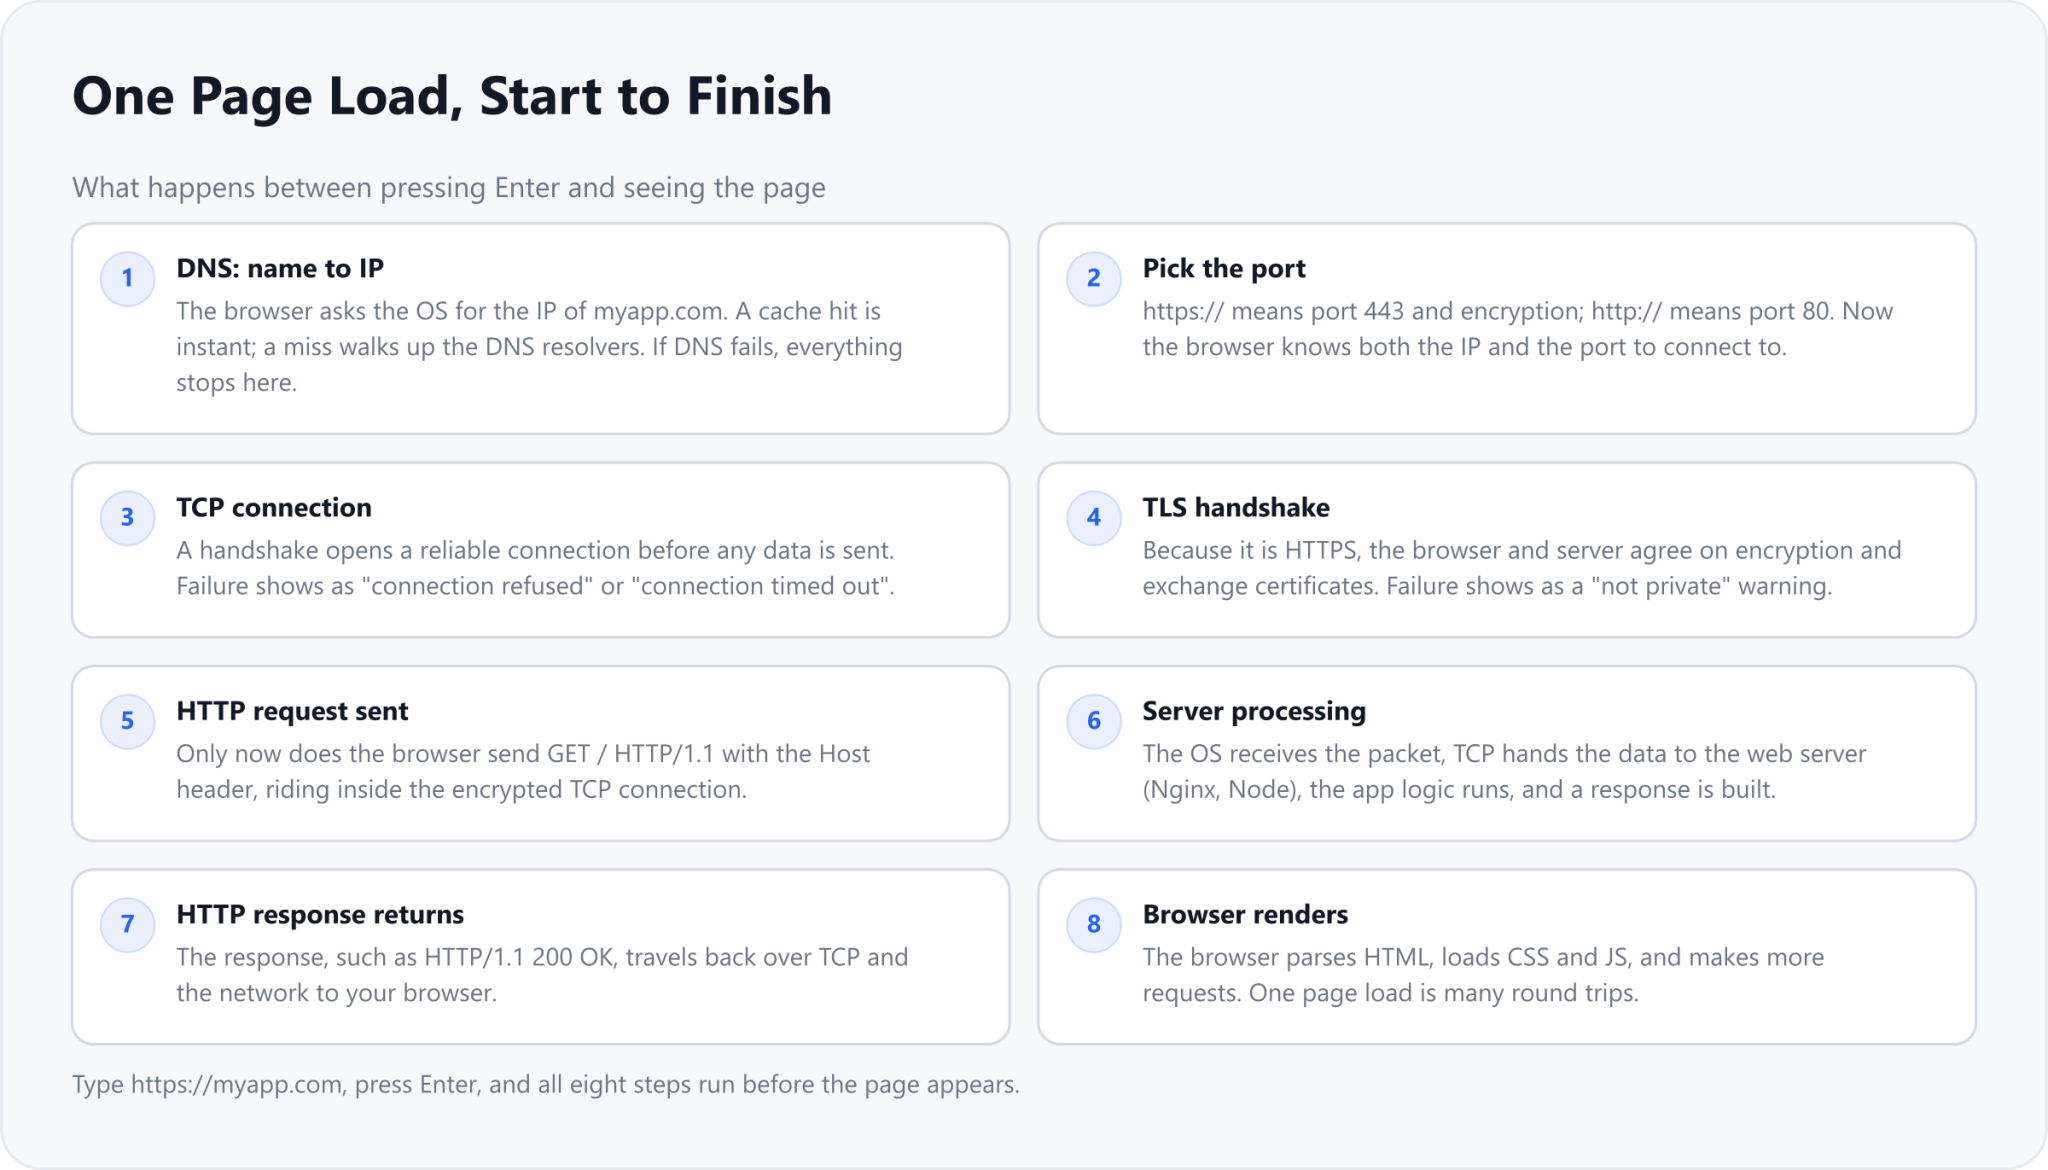
Loading a page runs eight steps: DNS resolves the name to an IP, the browser picks the port 443 for HTTPS, TCP opens a connection, TLS secures it, the HTTP request is sent, the server processes it, the HTTP response returns, and the browser renders the page.
One page load, start to finish: eight steps from Enter to rendered page.
Progressive Breakdown
Stage 1

DNS resolves the name to an IP

Stage 2

The browser picks the port, 443 for HTTPS

Stage 3

TCP opens a reliable connection

Stage 4

TLS secures the connection

Stage 5

The HTTP request is sent

Stage 6

The server processes the request

Stage 7

The HTTP response returns

Stage 8

The browser renders the page and makes more requests

Where things usually break

Because the flow is a sequence, each stage is its own failure point. Knowing which stage failed tells you where to look.

StepCommon failure
DNSWrong record, cache issues
TCPPort closed, firewall
TLSExpired certificate
HTTP500 errors
ServerApp crash, timeout

Commands mapped to each step

And the tools from Part 1 map directly onto the journey — one command per stage, so you can test exactly where the request stops.

StepCommand
DNSdig, nslookup
Reachabilityping
TCPnc, telnet
HTTPcurl
TLScurl -v, browser errors
INFO

That is the core internet flow: DNS, port, TCP, TLS, HTTP request, server, response, render. Once you can see the stages, every connection problem has an address. Next in the DevOps series, we go deeper into IP addresses and ports.

Drafted with AI assistance from an author outline and edited by TechToolsHQ.

Share
Series: DevOps

Part 2 — How the Internet Actually Works: From Browser to Server

Part 2 of 2
← Previous partPart 1 — Basic Networking for DevOps: Terms, Tools, and Debugging
Latest episode in this series.

Enjoying the DevOps series?

TechToolsHQ is an independent, reader-supported tech platform. If this article saved you time, solved a tough problem, or helped you learn a new skill, consider supporting our work. Your support helps us keep our in-depth series 100% free and updated for everyone.

100% optional · Reader supported · Independent researchSupport our work

Don't miss the next deep-dive

Weekly breakdowns of the tools students and builders actually use.

No spam·Unsubscribe any time·Privacy-first