Inspecting the page: the DOM
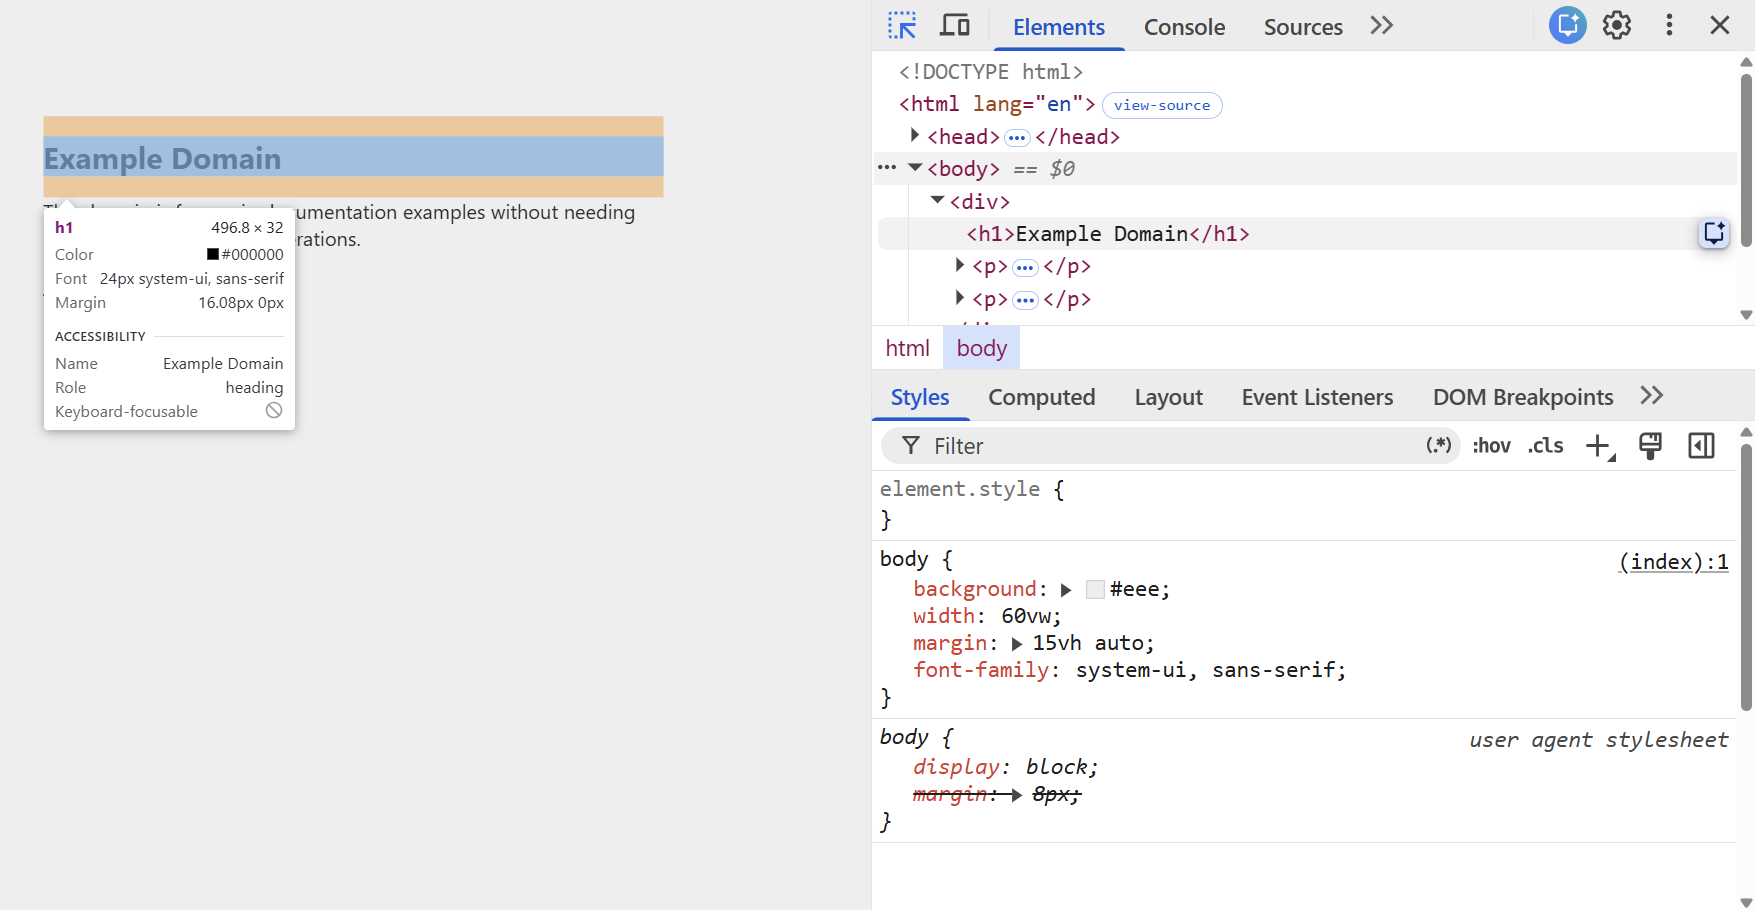
When Chrome loads a page, it turns the HTML into a live, tree-shaped model called the DOM (Document Object Model). The Elements panel shows this tree. Each branch is an element — a heading, a paragraph, an image — and selecting one highlights it on the page so you can see exactly what it is.
There are three ways to select an element, and you will use all of them. Right-click anything on the page and choose Inspect. Click the Select an element tool (the arrow-in-a-box icon, or press Ctrl+Shift+C / Cmd+Shift+C), then click on the page. Or click a node directly in the DOM tree — as you hover each node, DevTools highlights the matching area on the page.
Editing HTML live
You can change the page's HTML directly in the DOM tree, and the page updates instantly. This is perfect for testing a wording change or trying a different structure before you touch your real code.
- Edit text: double-click the text inside a node and type.
- Edit the whole element: right-click a node and choose Edit as HTML — you get syntax highlighting and autocomplete.
- Edit an attribute: double-click the attribute name or value (for example, change an image's src).
- Reorder: drag a node up or down the tree.
- Hide it: select a node and press H to toggle its visibility.
- Delete it: select a node and press Delete.
- Duplicate it: press Shift + Alt + Down (Shift + Option + Down on Mac).
Reading CSS: the Styles pane and the cascade
With an element selected, the Styles pane on the right lists every CSS rule that applies to it. Rules are shown in cascade order, and this is the single most useful thing the Styles pane teaches you: why an element looks the way it does.
If a property is struck through, another rule overrode it. That happens because of the cascade and specificity — when two rules target the same element, the more specific one wins (an ID beats a class, a class beats a tag). Seeing the struck-through line tells you instantly which rule is actually in charge.
/* CSS cascade: which rule wins? */

#price { color: red; }    /* ID selector      — High specificity  (WINS) */
.price { color: blue; }   /* Class selector   — Med specificity   (Struck through) */
p      { color: green; }  /* Element selector — Low specificity   (Struck through) */

/* DevTools strikes through the losers so you can see the winner at a glance. */
Editing CSS live
Everything in the Styles pane is editable. Click a value to change it, and untick the checkbox next to a declaration to toggle it off. To add a new declaration, click inside the braces of a rule, or use the element.style block at the top to apply an inline style to just the selected element.
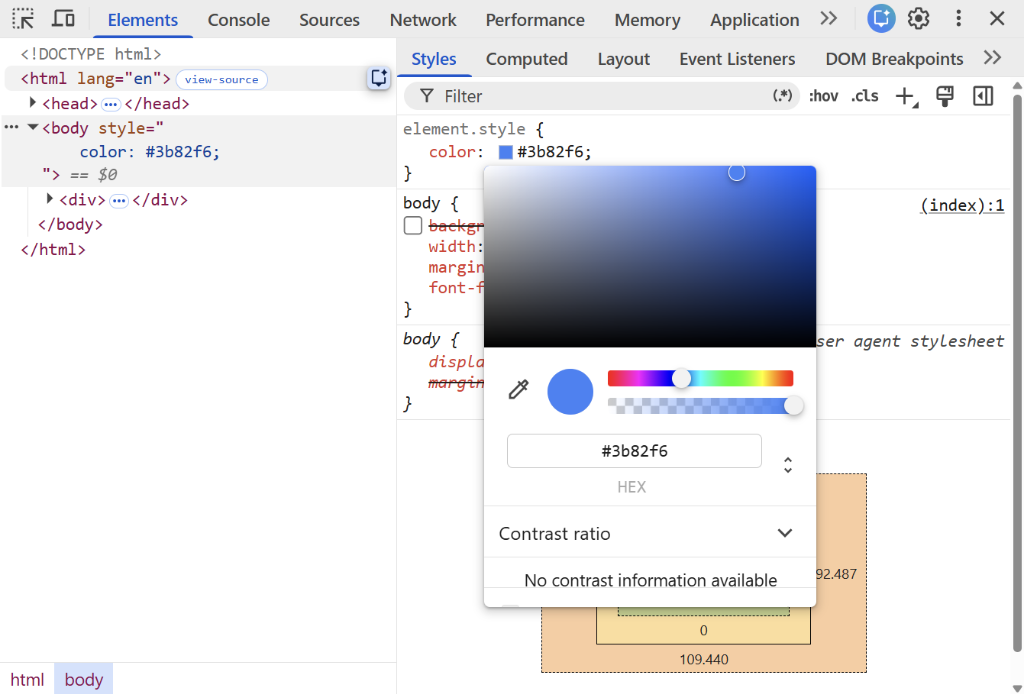
- Color Picker: click the small color swatch next to any color value to open the Color Picker, then use the eyedropper to sample a color from anywhere on the page.
- Toggle classes (.cls): click the .cls button to add a class or switch existing classes on and off.
- Force a state (:hov): click the :hov button, or right-click a node and choose Force State, to hold a pseudo-state like :hover, :focus, :active, :visited, or :focus-within — so you can style a hover effect without keeping the mouse still.
The box model: spacing made visible
Every element is a box with four layers: content, then padding around it, then a border, then margin outside that. Open the box model diagram with the Show sidebar button in the Styles pane. Double-click any value in the diagram to change the width, height, padding, margin, or border and watch the page shift.
Margin
Outer transparent spacing around the element
Border
The line surrounding the padding and content
Padding
Clear space around the content inside the border
Content
The actual text, image, or child elements
The Computed tab: the final answer
The Computed tab (next to Styles) shows only the CSS that is actually being applied, after the cascade has resolved every conflict. When you cannot work out why an element has a certain size or color, Computed gives you the final value and lets you expand it to see which rule produced it.
The Changes drawer: never lose an edit by surprise
Every live edit you make is tracked in the Changes drawer. Open it with the Command Menu (Ctrl+Shift+P, type "Show Changes") or from More Tools › Changes. It shows a color-coded diff of your CSS edits, a Copy button to paste them into your real source file, and a Revert all changes button to undo them.
Hands-on: fix a broken card
Open any web page with a "card" on it — a product tile, an article preview, anything boxed. Then practice the full loop.
- 1Inspect: right-click the card's title and choose Inspect.
- 2Read: in the Styles pane, find one struck-through property and work out which rule overrode it.
- 3Edit: change the card's background color using the Color Picker, and its padding using the box model diagram.
- 4Force a state: use :hov to preview the card's hover style.
- 5Capture: open the Changes drawer and click Copy to grab your CSS diff.
- 6Break & Fix: reload the page (your edits vanish), then redo the background change from memory — and this time copy it before reloading.
What's next
You can now inspect and restyle any page by hand. But modern layouts — flexbox, grid, and container queries — are hard to debug by reading numbers alone. In the next part, we turn on DevTools' visual layout overlays to see exactly where your rows, columns, and gaps really are.
Frequently asked questions
- What does a struck-through style in the Styles pane mean?
- It means another CSS rule overrode that property. Because of the cascade and specificity, when two rules target the same element the more specific one wins, and DevTools strikes through the one that lost.
- What is the difference between the Styles tab and the Computed tab?
- The Styles tab shows every rule that could apply, in cascade order. The Computed tab shows only the final value actually applied after all conflicts are resolved — useful when you just need the answer.
- Why do my Elements-panel edits disappear when I reload?
- Live edits are stored only in the current browser session, not in the site's files. Reloading fetches the original files again. Copy your changes from the Changes drawer first, or use Workspaces/Local Overrides (covered later in this series) to persist them.
- How do I preview a hover effect without moving my mouse away?
- Use Force State. Click the :hov button in the Styles pane, or right-click the element and choose Force State, then tick :hover. The state stays applied while you edit its styles.
This article was produced with AI assistance for drafting and research. All facts have been verified and the final content has been reviewed and approved by a human editor.